The time it takes to download and upload data from the server depends on the PHP time limit. The less the PHP time limit remains in WordPress, the sooner the server times out, and the data operation fails. Fatal error: Maximum execution time of 30 seconds exceeded starts showing on display. So let me tell you How to increase PHP Time Limit for WordPress sites.
Fatal error: Maximum execution time of 30 seconds exceeded in yourscript.php
What is PHP Time Limit (max_execution_time):
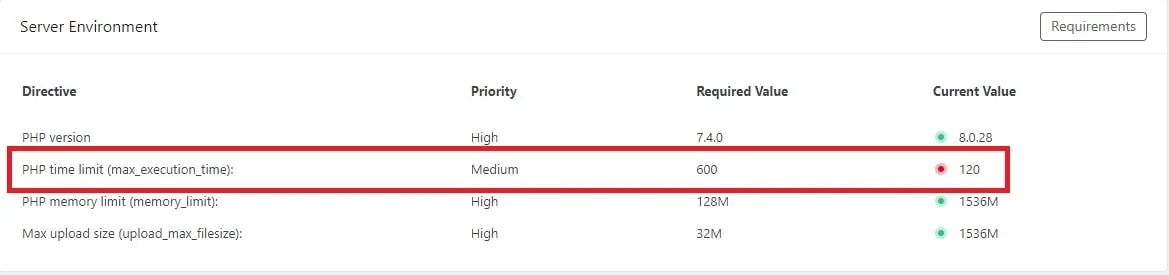
The PHP time limit is a configuration setting that specifies the maximum amount of time a PHP script can run before it is terminated by the server. By default, this time limit is set to 30 seconds, but it can be changed by modifying the “max_execution_time” directive in the PHP configuration file or by calling the “set_time_limit” function within the script itself.
The purpose of the time limit is to prevent long-running scripts from consuming excessive server resources or causing other problems. A fatal error occurs when you update a theme, or plugin and import demo data. The default host time is set to 30 seconds in the PHP time limit. There are many methods to increase its time.
Why Does the Maximum Execution Time Error Occur?
WordPress is a content management system built on the PHP programming language. To avoid the misuse of the server, the execution time has been set from the PHP script, so that the server closes after the operation at the set time.
However, it is important to note that increasing the time limit can also increase the risk of a script encountering a fatal error or entering an infinite loop, so it should be used with caution and only when necessary.
1. Contact Your Hosting Service Provider
This is the easiest and most secure method. You have two ways to contact your hosting service care, chat and call. Whatever you want, log in to your hosting website and click on the option of chat or contact. Customer care may ask for your security pin for verification.
Security PIN that you must have created while creating your account. After pin verification, you should tell customer care to increase the PHP time limit of your site. Customer care will easily increase the maximum execution time of your site.
2. PHP Maximum Execution Time Limit in php.ini
To increase the PHP time limit from PHP.ini, first of all, you have to log in to your Cpanel. Select your domain whose PHP time limit you want to increase. Each hosting company may be slightly different. In some, you can change only by number, and in some by script.
Such an option will come in Hostinger.

Such an option will come in Hostgator Basic Mode and Editor Mode.

max_execution_time = 600
600 = 10 Minutes
- Open the Cpanel.
- Double-click the php.ini file.
- Insert code into your php.ini file:
max_execution_time = 600
- Press Save and Close

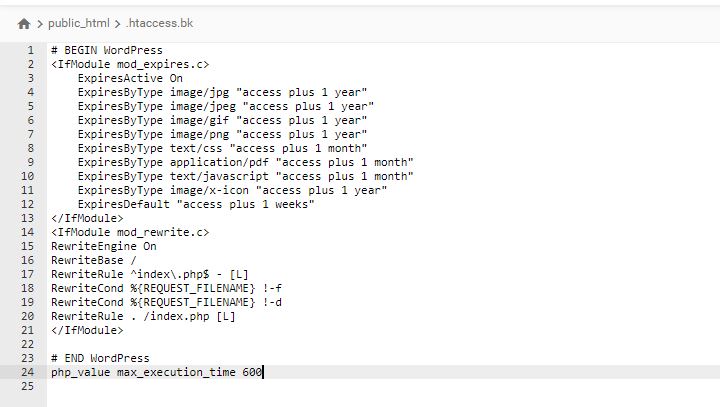
3. How to Increase PHP Time Limit Using .htaccess?
To increase the time limit in the .htaccess, go to Cpanel and open the file manager. It is possible that many websites are live in your hosting, open the file folder of the site for which you want to increase the time limit. After opening the folder, search for the htaccess file and double-click on it, which will open the file in edit mode. Insert this code php_value max_execution_time 600 inside the htaccess file, then save the file.
- Open the File Manager.
- Double-click the .htaccess file.
- Insert code into your .htaccess file:
php_value max_execution_time 600
- Press Save and Close.
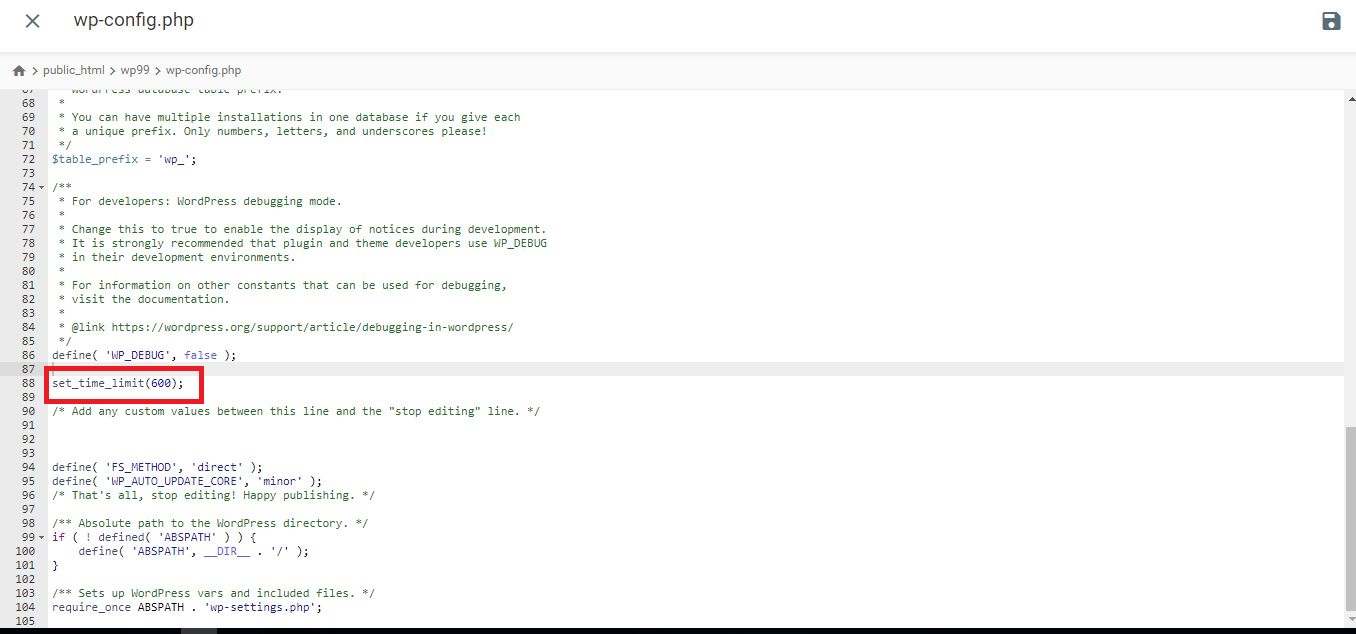
4. How to Increase PHP Time Limit Using wp-config.php?
To increase PHP time limit from wp-config, open Cpanel and click on file manager. Open the folder of your website after opening the file manager and find the wp-config file, then double click on the wp-config file the file will open in edit mode. After the wp-config file is opened in edit mode, there is no need to change much, just set_time_limit(600); paste the code on the bottom side. Then save the file.
- Open the File Manager.
- Double-click the wp-config.php file.
- Insert code into your wp-config.php file:
set_time_limit(600);
- Press Save and Close.
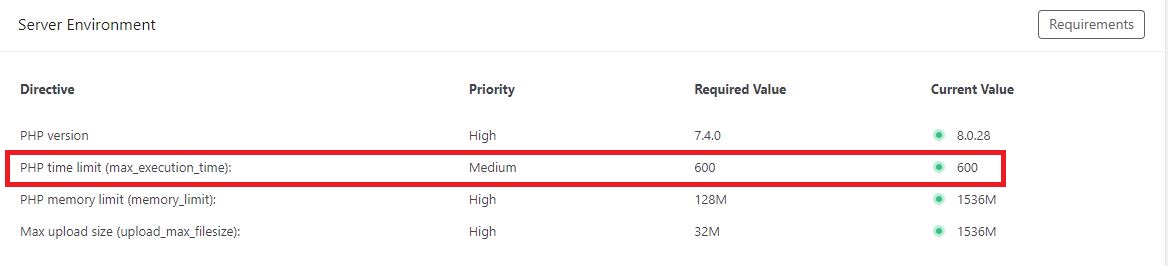
After Successfully Changing the PHP Execution time.
Website Security Read More